| 17/11/2019 14:35:11~~~~~~manpakhong |
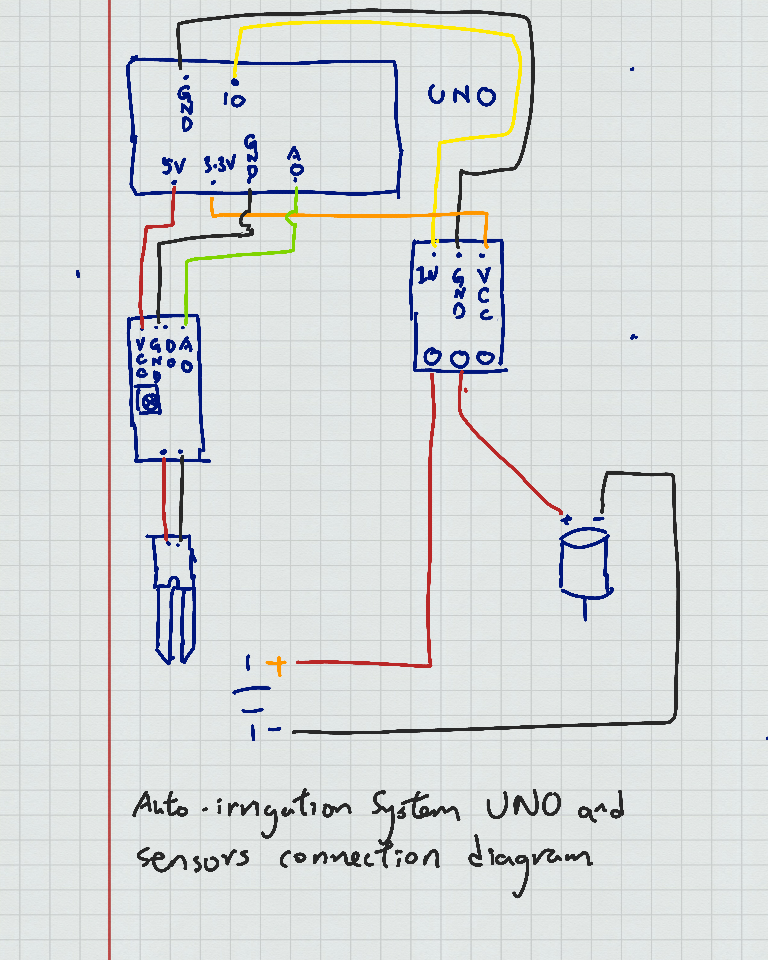
Auto-Irrigation system, UNO and sensors connection diagram |
Code: const byte potPin = A0; void loop() { |
| 17/11/2019 14:34:58~~~~~~manpakhong |
LED |
LED - voltage approximate 2V add 220 Ωomn resistance
|
| 07/04/2019 03:18:57~~~~~~manpakhong |
Pulse Width Modulation (PWM) |
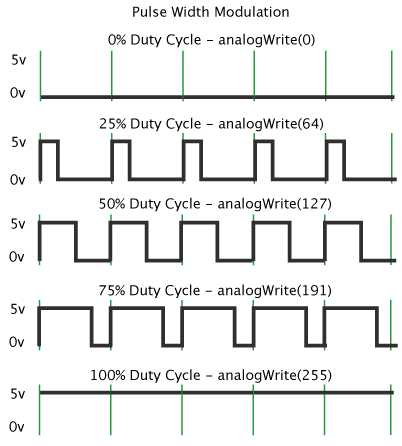
PWMThe Fading example demonstrates the use of analog output (PWM) to fade an LED. It is available in the File->Sketchbook->Examples->Analog menu of the Arduino software. Pulse Width Modulation, or PWM, is a technique for getting analog results with digital means. Digital control is used to create a square wave, a signal switched between on and off. This on-off pattern can simulate voltages in between full on (5 Volts) and off (0 Volts) by changing the portion of the time the signal spends on versus the time that the signal spends off. The duration of "on time" is called the pulse width. To get varying analog values, you change, or modulate, that pulse width. If you repeat this on-off pattern fast enough with an LED for example, the result is as if the signal is a steady voltage between 0 and 5v controlling the brightness of the LED.
In the graphic below, the green lines represent a regular time period. This duration or period is the inverse of the PWM frequency. In other words, with Arduino's PWM frequency at about 500Hz, the green lines would measure 2 milliseconds each. A call to analogWrite() is on a scale of 0 - 255, such that analogWrite(255) requests a 100% duty cycle (always on), and analogWrite(127) is a 50% duty cycle (on half the time) for example.
Once you get this example running, grab your arduino and shake it back and forth. What you are doing here is essentially mapping time across the space. To our eyes, the movement blurs each LED blink into a line. As the LED fades in and out, those little lines will grow and shrink in length. Now you are seeing the pulse width. |

